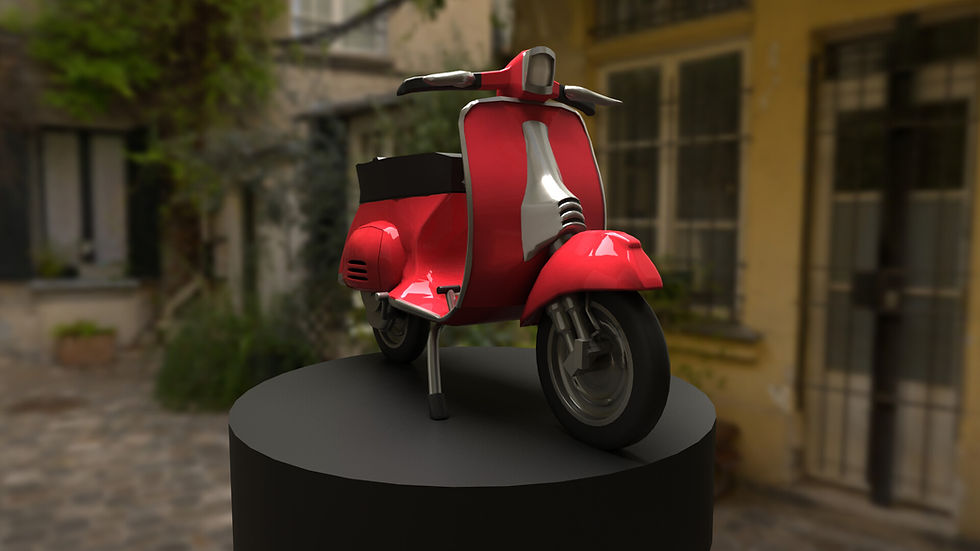
1972 Vespa
May 25, 2022 at 12:00:00 AM
1972 Vespa
May 25, 2022 at 12:00:00 AM
Description
The 1972 Vespa model represents a key milestone in my early exploration of 3D modeling, marking my first major project in Autodesk Maya. This model allowed me to delve into the world of 3D design and rendering, learning foundational skills that would be essential for future projects. At the time, I was still unfamiliar with advanced tools like ZBrush and Adobe Substance Painter, so I relied solely on Autodesk Maya and Arnold for texturing and rendering. The project focused on creating a detailed, realistic representation of the Vespa scooter, capturing its iconic features and translating them into a 3D environment.


.jpg)
As my first real attempt at 3D modeling, this project pushed me to challenge myself in terms of both technical skills and creative problem-solving. The goal was not just to create a functional 3D model, but also to understand the core principles of design in 3D space—such as topology, proportion, and materiality. The final model was meant to serve as both a learning experience and a showcase of my ability to bring a real-world object into the digital realm. It also served as an important stepping stone toward more complex designs and future 3D projects.
Video
As my first real attempt at 3D modeling, this project pushed me to challenge myself in terms of both technical skills and creative problem-solving. The goal was not just to create a functional 3D model, but also to understand the core principles of design in 3D space—such as topology, proportion, and materiality. The final model was meant to serve as both a learning experience and a showcase of my ability to bring a real-world object into the digital realm. It also served as an important stepping stone toward more complex designs and future 3D projects.
Process
The process of creating the 1972 Vespa model began with extensive reference gathering. I studied various images of the scooter from different angles to ensure accuracy in proportion, detail, and structure. I also examined other 3D models of vehicles to understand industry-standard modeling techniques. With this information, I began blocking out the basic shapes of the Vespa in Autodesk Maya, carefully establishing the general form and layout before diving into more detailed work.
.jpg)

Once the basic structure was established, I moved on to adding finer details like the wheels, handlebars, and headlamp. At this stage, I focused on ensuring that each part was proportionally correct and seamlessly integrated with the rest of the model. I used a combination of polygonal modeling and edge loops to ensure the surfaces were clean and smooth. While working in Maya, I made sure to create separate components for easy texturing later on.
Texturing was a challenge, as I was working without the advanced tools I would later learn to use. I relied on Arnold’s built-in material options to create realistic surface textures, such as the glossy finish of the Vespa’s metallic body and the matte rubber of the tires. This process involved a lot of trial and error, adjusting the materials to get the right reflectivity and roughness. Lighting was another key element, as I had to experiment with different setups to highlight the model’s details and give it a realistic appearance.
.jpg)
Wireframes
The process of creating the 1972 Vespa model began with extensive reference gathering. I studied various images of the scooter from different angles to ensure accuracy in proportion, detail, and structure. I also examined other 3D models of vehicles to understand industry-standard modeling techniques. With this information, I began blocking out the basic shapes of the Vespa in Autodesk Maya, carefully establishing the general form and layout before diving into more detailed work.
Reflection
Reflecting on how far I’ve come since creating the Vespa, I realize just how much this project influenced my approach to future work. The challenges I faced in terms of accuracy, texturing, and lighting gave me a deeper understanding of the intricacies of 3D design. This experience helped me develop a more systematic and thoughtful approach to my work, knowing that every model requires careful attention to detail and a balance between creativity and technical execution. Moving forward, I look forward to applying the skills I gained from this project to more complex models and expanding my use of software like ZBrush and Substance Painter to enhance my designs even further.
